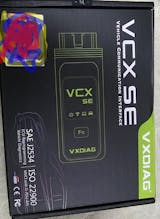
During the use of VXDIAG devices, some users have reported that the VX Manager interface shows a license validity period of only 60 days, which seems inconsistent with the perceived "permanent license". It is important to clarify that the "permanent license" for VXDIAG devices does not mean lifelong automatic validity without any operation. Instead, it requires manual updates of firmware and licenses every 60 days to maintain functionality. This is a unified license management mechanism for all VXDIAG VCX series products, and does not indicate a device malfunction or license invalidation.
I. Core Cause of the Issue
To ensure device compatibility and functional security, VXDIAG adopts a "regular firmware + license synchronization update" mechanism. The device's underlying firmware must match the license information, and synchronization updates need to be completed via official tools every 60 days. Otherwise, the license status will show a countdown. Simply follow the standard procedure to extend the license validity, with no additional fees required.
II. Standard Solution (Applicable to All VXDIAG VCX Series)
-
Obtain the Latest Version of VX Manager
Download the latest version of the VX Manager installation program from VXDIAG's official designated channels (e.g., official website download center, authorized supplier platforms) to avoid compatibility issues with older versions.
https://vxdiag.com/blogs/blog/free-download-vxdiag-newest-vx-manager-and-beta-version-mega-links
-
Complete Software Installation and Device Connection
Run the installation program and follow the prompts to complete the new installation of VX Manager. Connect the VXDIAG device to the computer via USB or a designated interface, and ensure the device indicator light is on normally (indicating a stable physical connection). Meanwhile, confirm that the computer is connected to a stable network (for data transmission). -
Perform Firmware and License Updates Step-by-Step
- Launch VX Manager; the system will automatically detect the connected VXDIAG device.
- Click the "Firmware" option in the left function bar, select "Start Update", and wait for the firmware package to download and install automatically. Do not disconnect the device during this process to avoid firmware damage.
- After the firmware update is completed, click the "Update License" button. The system will automatically verify the device information and synchronize the latest license. Once completed, the license validity period displayed on the interface will be extended again.

III. Notes
- Ensure the computer has a stable network connection during each update. If the update is interrupted, restart VX Manager and repeat the above steps.
- If the license still shows an abnormality after the update, check whether the device driver is working properly (confirm there is no yellow exclamation mark in "Device Manager"), or contact VXDIAG official technical support and provide the device serial number for further troubleshooting.


